Before you begin
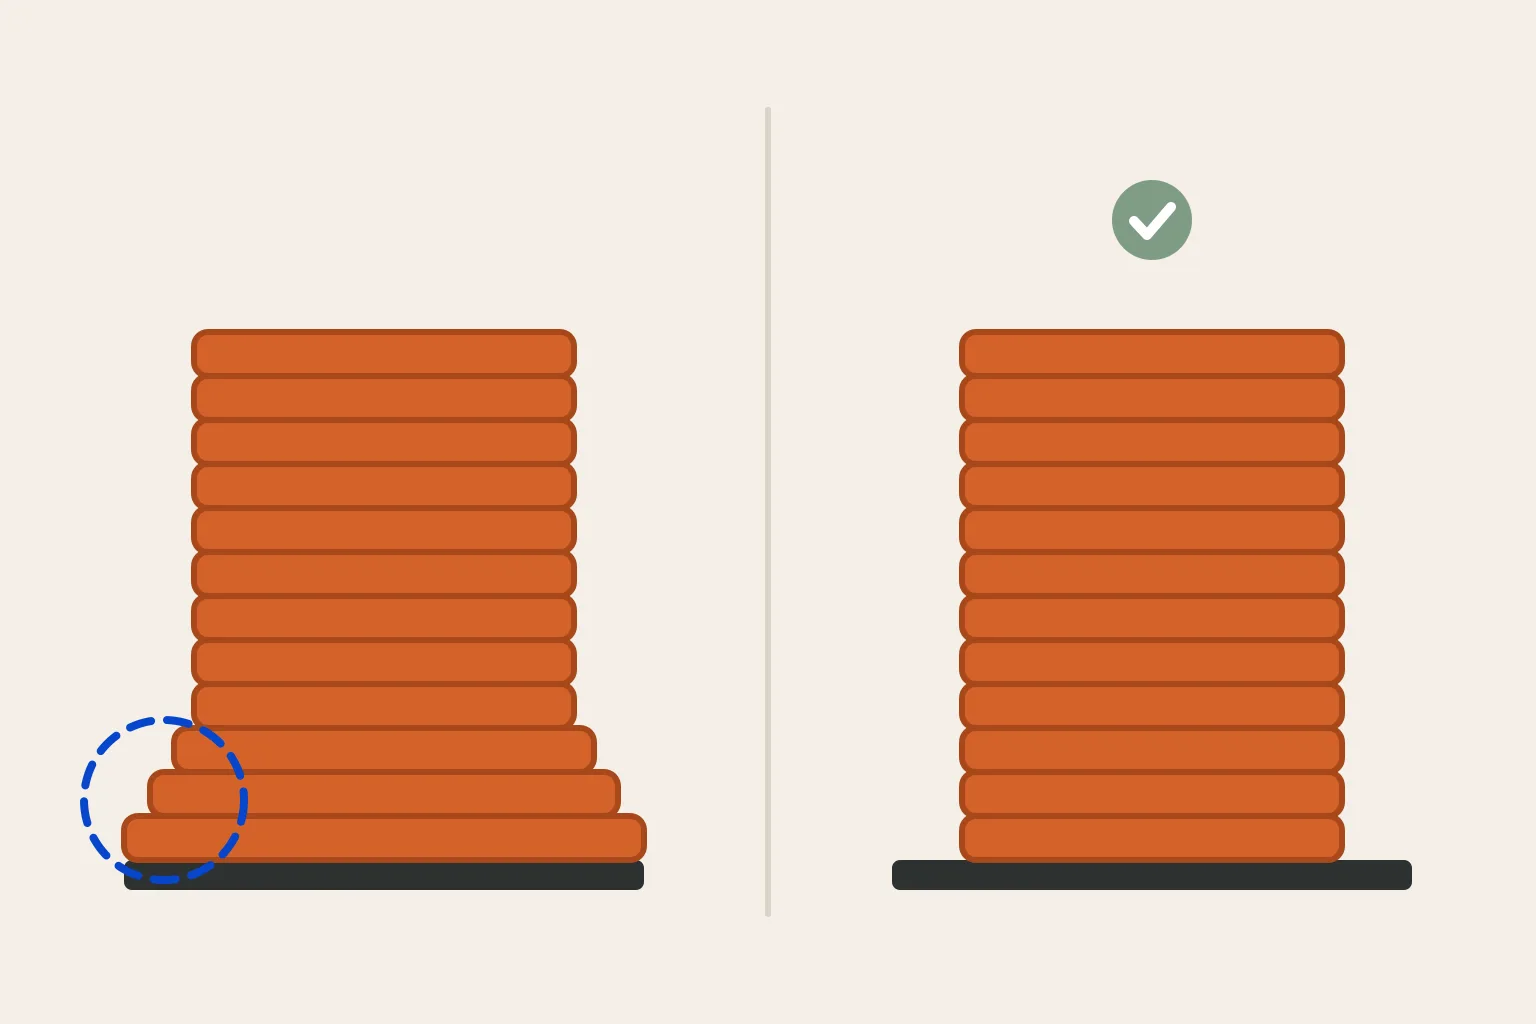
Elephant's foot is a lip around the bottom of a print. Bambu Lab describes it as the first layer, and sometimes the first few, coming out wider than the walls above. Two things combine to cause it: the first layer is pressed onto a heated bed and stays soft, and the weight of later layers presses down on a base that has not fully set. Larger parts and wider bases tend to show it more.
A little flare is normal. Prusa notes the first layer is squished against the bed and is usually slightly wider than designed, which rarely matters on a display piece. It matters on parts that must fit: Bambu Lab mentions assemblies, snaps, rails and shaft holes. This guide shows how to confirm the fault, measure it, fix the setup causes first, and then use slicer compensation and design changes for the remainder.
Confirm it is elephant's foot
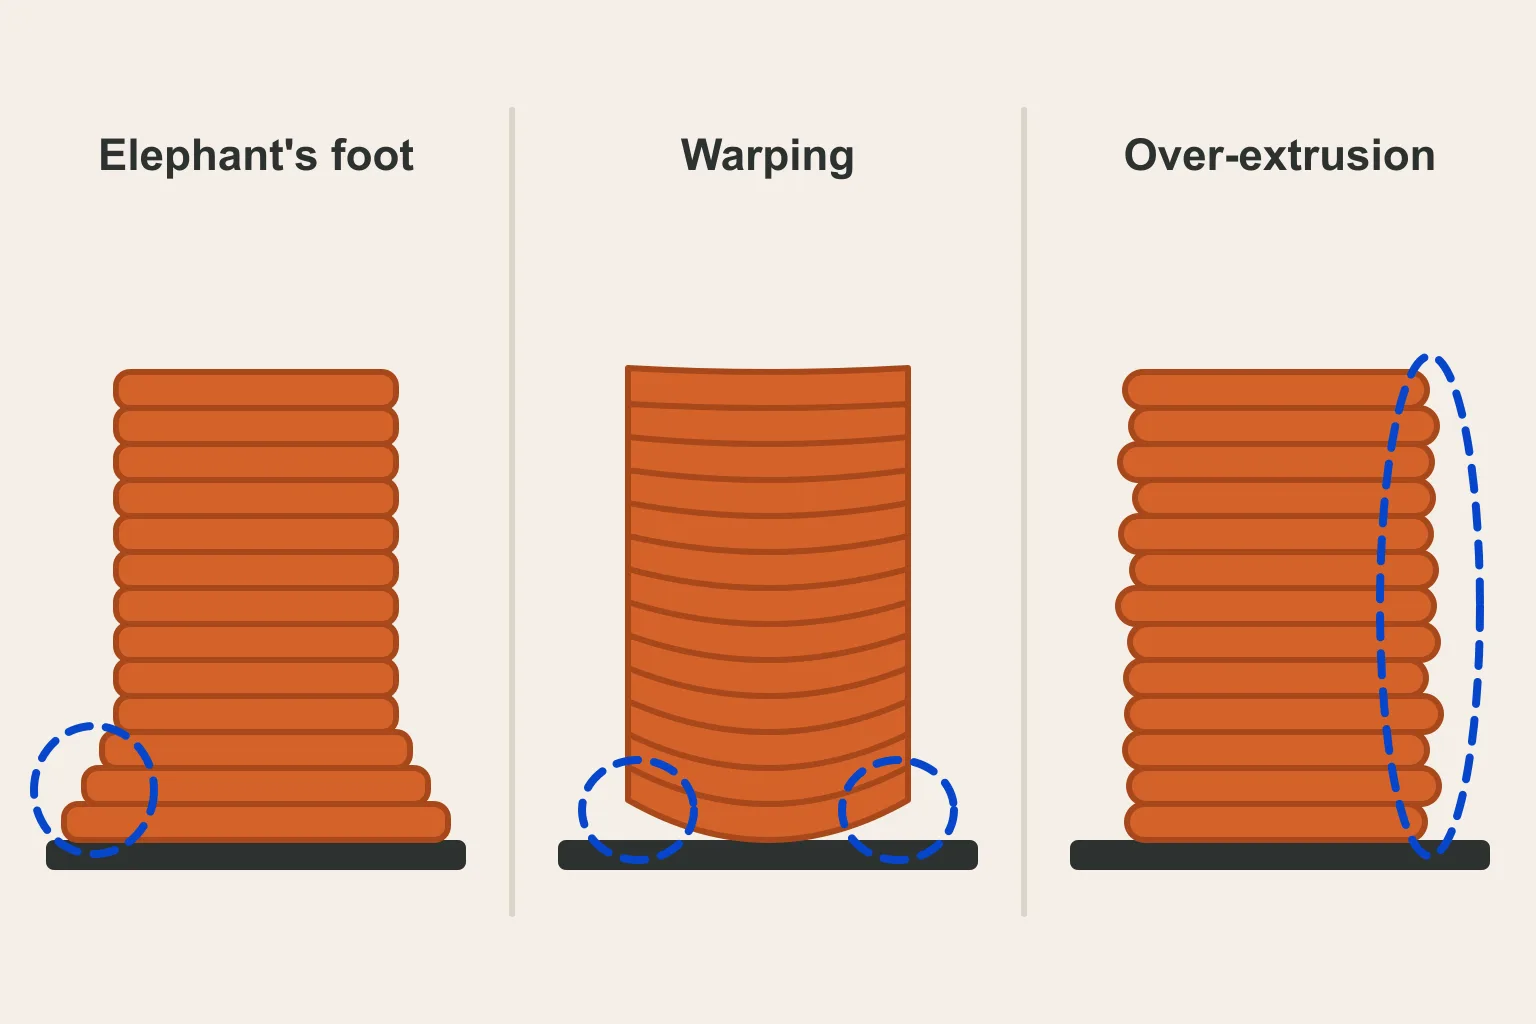
Run a fingernail up the side of the part from the bed. With elephant's foot, the lip is confined to the lowest layers; Polymaker notes the shape usually corrects itself after roughly 5 to 10 layers. Simplify3D describes a related effect where a nozzle set too close on the first layer leaves several oversized layers at the bottom of the part. Either way, the base stays flat on the bed and the walls above it are straight.
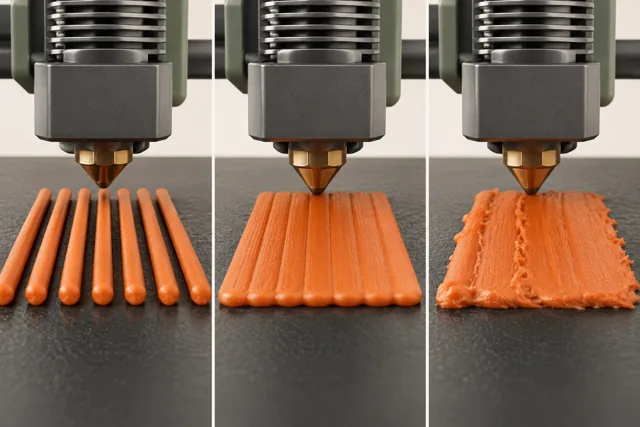
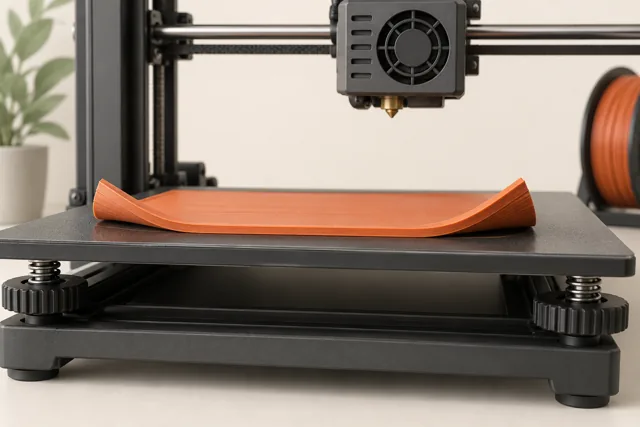
Two faults look similar at a glance. Warping lifts corners or edges away from the bed as the part cools and contracts, so the base is no longer flat. Over-extrusion puts too much plastic into every layer, which Simplify3D says spoils the outer dimensions of the whole part rather than only the bottom. Creality adds that an uneven bed can create a flare on one side only, because the nozzle is closer to the plate there.
| What you see | Likely fault | Where to look |
|---|---|---|
| Lip on the bottom layers only; flat base | Elephant's foot | Z offset, bed temperature, first-layer settings |
| Flare on one side or corner only | Uneven first-layer height | Bed leveling or mesh calibration |
| Corners curled up off the plate | Warping | Adhesion, cooling and enclosure |
| Every layer oversized or lumpy | Over-extrusion | Flow or extrusion multiplier |
Measure the flare before you change anything
A measurement tells you how much to correct and lets you check whether a change worked. Bambu Lab publishes a simple method. Print a plain block with compensation set to zero and no brim, let the bed cool fully before removing it, then measure with a caliper that reads to 0.01 mm. Measure in the middle of each side, away from the corners, and touch the flared edge lightly because pressing hard deforms it.
Compare the bottom width with the width higher up the part. The difference on X and on Y, averaged, is the flare you need to remove. Simplify3D makes a related point for dimensional checks in general: measure well above the first layers so the bottom does not distort the reading. Bambu Lab also notes that the right value changes between build plate types, so measure again after switching plates.
- Print a simple block with elephant's foot compensation at 0 and no brim.
- Let the bed cool to room temperature before removing the part.
- Measure X and Y near the top, at the middle of each side.
- Measure X and Y at the very bottom with light caliper pressure.
- Subtract top from bottom on each axis and average the two results.
Raise the nozzle if the first layer is over-squished
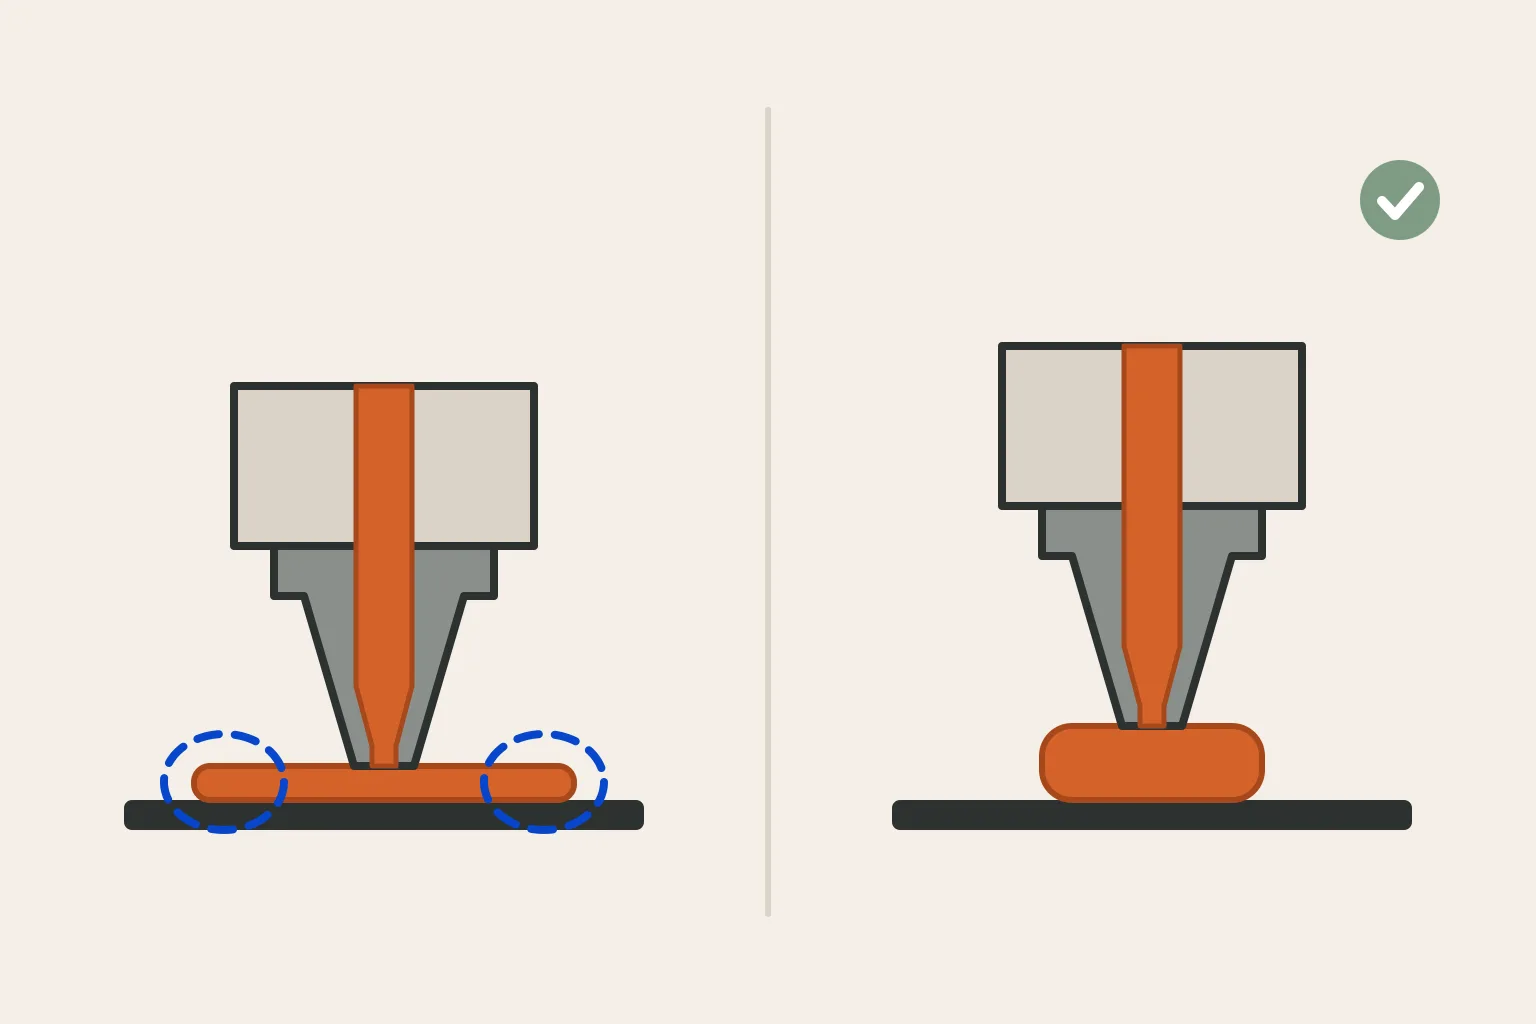
The most common cause is a nozzle that sits too close to the bed. Polymaker explains that material builds up and is pushed outward when there is not enough gap, and Creality calls this a Z offset that is too low. Simplify3D gives an example: a 0.2 mm first layer printed with the nozzle only 0.1 mm from the plate produces an oversized first layer that also affects the layers above it.
Use your printer's first-layer tools to set the height. Prusa's printers use Live Adjust Z and a first layer calibration, and Prusa warns against lowering Live Adjust Z to make up for poor adhesion: too low can damage the sheet. A clean print surface is a better route to adhesion than extra squish. Creality suggests raising the offset in small steps, such as 0.05 to 0.1 mm, and checking the result each time. If the flare is worse on one side, level the bed or run your printer's bed calibration before adjusting the offset. Make one change at a time and reprint the same test block, so you know which adjustment reduced the flare.
Keep the bed within the material's range
A bed that is too hot keeps the base soft for longer. Polymaker explains that running the bed above the material's glass transition temperature lets the bottom layers deform as more material is deposited, and advises against printing PLA on a bed hotter than 60 °C, and sometimes 50 °C. Start from the filament maker's recommended bed range, and if the flare persists with a correct Z offset, try a slightly lower setting within that range.
Creality suggests lowering the bed in 5 degree steps and turning the part cooling fan on earlier, around layer 2 or 3, so the base sets before more weight arrives. In Cura, the layer where fans reach their regular speed is the Regular Fan Speed at Layer setting, which defaults to 2. Watch for the trade-off: less heat and more cooling can weaken adhesion, and the warping guide covers that side of the balance.
Use your slicer's compensation setting
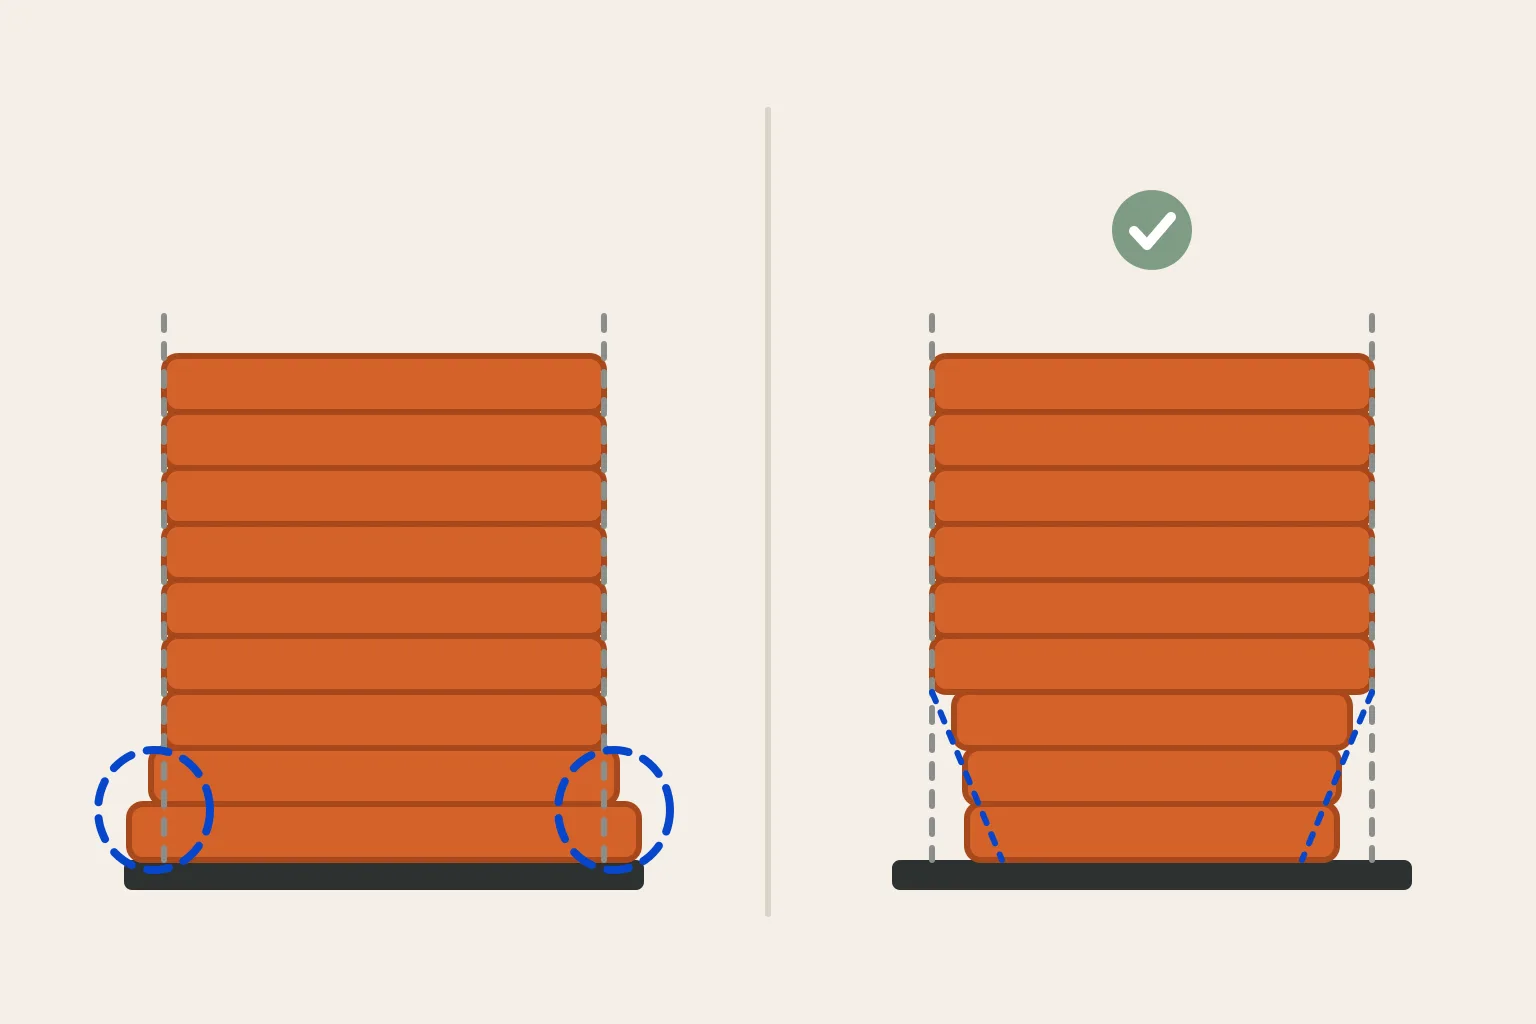
Slicers can shrink the first layer slightly so that, once squished, it lines up with the walls. PrusaSlicer calls this Elephant foot compensation, found under Print Settings, Advanced, in Advanced or Expert mode. Prusa says values around 0.2 mm usually suit a 0.4 mm nozzle, that official Prusa profiles enable it by default, and that PrusaSlicer 2.2 and newer avoid over-shrinking thin first-layer lines. Bambu Studio uses the same name under Process, Quality, Precision, and Bambu Lab suggests entering your measured value there.
In UltiMaker Cura the setting is Initial Layer Horizontal Expansion. Cura's definition describes it as an offset applied to the first layer, where a negative value compensates for elephant's foot; it defaults to 0 mm. Do not confuse it with Horizontal Expansion, which offsets every layer and is meant for hole sizes. Both Prusa and Bambu Lab note that a brim may look detached from the part in the preview once compensation is on; the squish usually fills that gap in the real print.
| Slicer | Setting name | Where to find it |
|---|---|---|
| PrusaSlicer | Elephant foot compensation | Print Settings > Advanced (Advanced or Expert mode) |
| Bambu Studio | Elephant foot compensation | Process > Quality > Precision |
| UltiMaker Cura | Initial Layer Horizontal Expansion | Negative value shrinks the first layer; default 0 mm |
Design the base to hide the flare
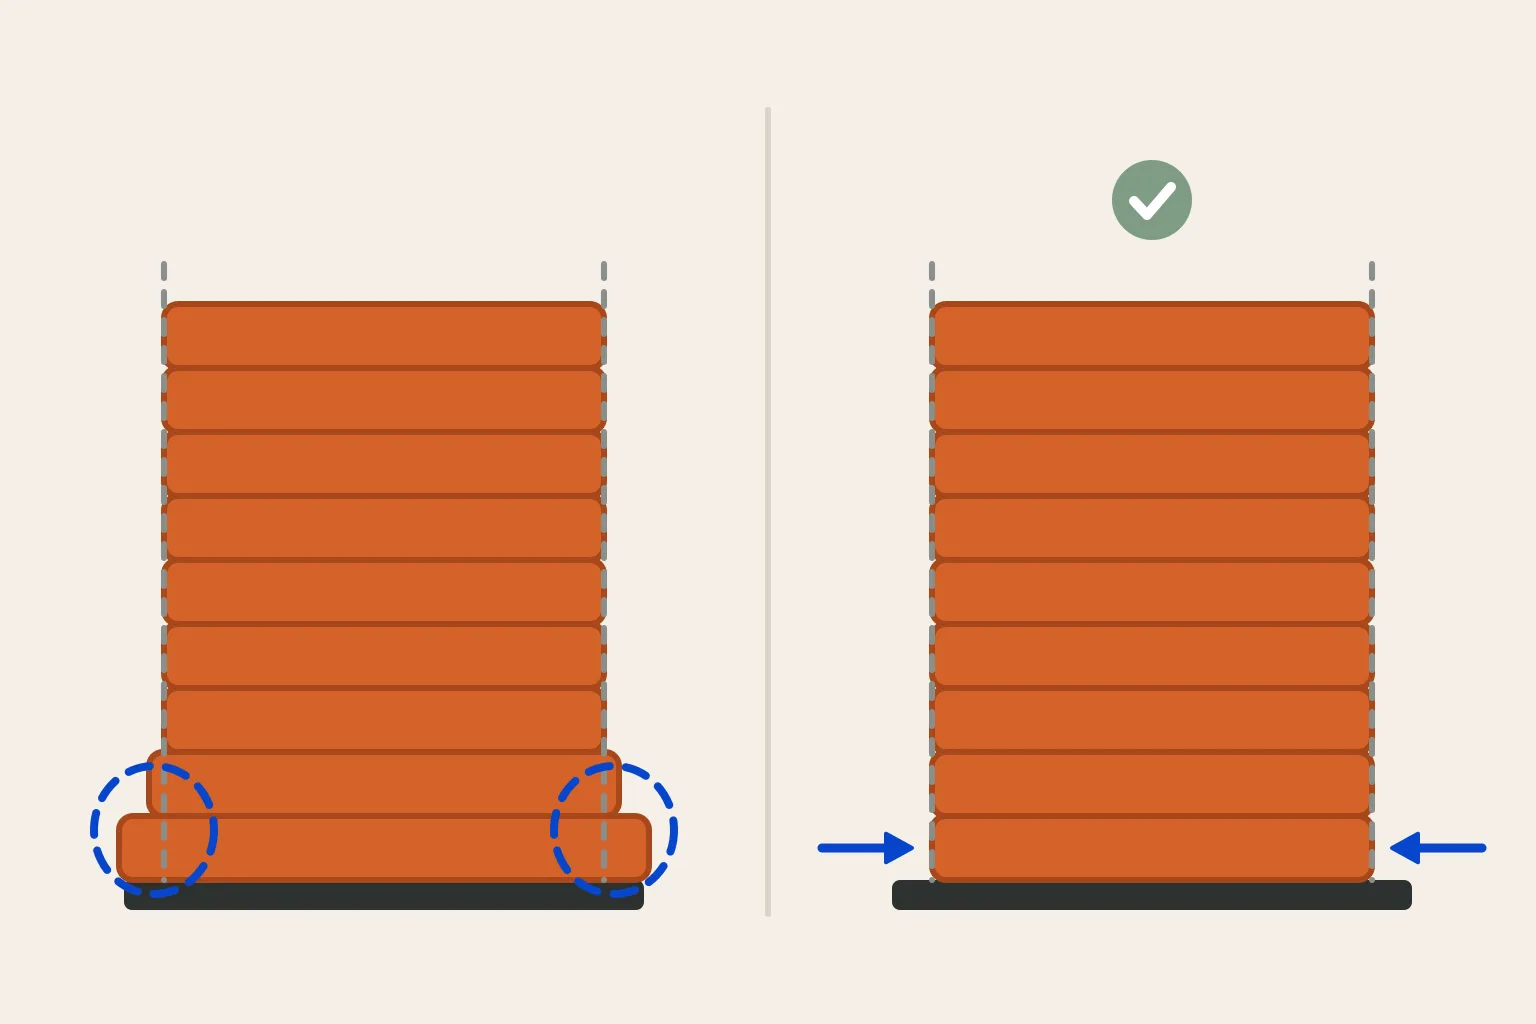
If you control the model, a small chamfer along the bottom edge gives the flare somewhere to go. Creality suggests a chamfer or fillet on the base edges so the bulge lands on a sloped face instead of a functional edge. Prusa's design guidance favors chamfers over fillets on edges that face the bed, because a fillet there creates a very steep overhang, and notes that chamfers on mating edges make assembly easier.
A raft is another option. Polymaker says a raft acts as a barrier between the print and the bed and should make elephant's foot disappear, because the raft takes the squish and heat instead of the part. It costs extra material, print time and a removal step. Creality notes that a brim helps adhesion but does not eliminate elephant's foot.
Check the result and keep a record
Reprint the same test block with your changes and measure it the same way. Creality recommends adjusting compensation in small steps of about 0.05 to 0.1 mm, because too much compensation makes the base undersized and can separate the brim from the part. Prusa gives a practical check: if a brim does not join the part in the real print, the compensation is probably set too high. Prusa also notes that near thin features the preview may show a distorted first layer, and that setting compensation to 0 removes the effect if it matters.
For parts that mate with others, also try the real assembly. Bambu Lab names snaps, rails and shaft holes among the features a flared base affects, so check holes and slots that sit at the bottom of the part separately from the outer walls. Save the working value with the plate, filament and nozzle you used, since Bambu Lab notes the value differs between build plate types. If the flare varies across the bed even after leveling, or the first layer cannot be set consistently, run your printer's bed calibration and then contact the manufacturer with photos and measurements.
Common questions
Is a small amount of elephant's foot normal?
Yes. Prusa notes the first layer is normally a little wider because it is squished onto the bed, and Bambu Lab says slight flare can be ignored on appearance parts. Correct it when parts must fit together.
Why does the brim look detached in the preview?
Compensation shrinks the first layer, and the preview does not show the squish that fills the gap. Prusa and Bambu Lab both describe this as expected. If the brim stays detached on the real print, reduce the value.
Can I use one compensation value for every printer and plate?
No. Bambu Lab says the value changes between build plate types, and Z offset and bed temperature also affect it. Measure again after changing the setup.
Does a raft solve elephant's foot?
Polymaker reports that a raft should make it disappear because the raft absorbs the squish. It adds material, print time and a removal step, so weigh it against correcting the Z offset and using compensation.
Continue with the sources
- Elephant foot compensation Prusa Research · Checked 2026-10-16
- First layer issues Prusa Research · Checked 2026-10-15
- Modeling with 3D printing in mind Prusa Research · Checked 2026-10-15
- Warping Prusa Research · Checked 2026-10-15
- Elephant foot compensation Bambu Lab · Checked 2026-11-02
- Elephant Foot (Smooshed First Layer) Polymaker · Checked 2026-11-02
- Cura setting definitions (fdmprinter.def.json) UltiMaker (GitHub) · Checked 2026-11-02
- 3D Printer Elephant Foot: Causes, Fixes, and Compensation Explained Creality · Checked 2026-11-02
- Dimensional Accuracy Simplify3D · Checked 2026-11-02
- Over-Extrusion Simplify3D · Checked 2026-11-02
This guide synthesizes the cited references and includes illustrative examples, not hands-on test results. Follow the instructions for your exact printer, material, and software version. Diagrams simplify geometry and equipment; they are not photographs, measured results, or model-specific setup instructions.